3-2-1 Backup Protocol

Note: The following 3-2-1 backup protocol is used for all kinds of digital assets. This includes documents, applications, and photos etc. Everything on your computer as well as data you have stored online in social media and places like Evernote and Facebook. To keep the online data backed up, you can usually export your data and save it to your devices. (Desktop hard drive or external hard drives.)

This 3-2-1 method is the protocol recommended by the US Government.

US-CERT Data Backup Options PDF

As far as your photos, videos, and other things considered memories, I wholeheartedly recommend that you use a designated device for only memories. This designated device becomes your Photo Capsule and like a time capsule, it preserves and protects your lifetime of photos for your future self.

To clarify, use one device to back up your computer hard drive, and another device designated for only memories (photos and videos). The goal is that your Photo Capsule contains all of your memories that come from different sources. (scanned print photos, cameras, dvds, cds, memory sticks, iPhone etc.)

Whatever backup option you choose, remember to follow the 3-2-1 protocol:

3 – Keep 3 copies of any important file: 1 primary and 2 backups.

2 – Keep the files on 2 different media types to protect against different types of hazards.  (external hard drive, cloud service)

1 – Store 1 copy offsite and out of state if possible (outside your home or business to avoid any widespread natural disaster).

You can create backups on demand (manually when you choose) or recurring. I recommend doing both. Keep a primary copy on your computer’s hard drive. Stick to a weekly digital backup schedule, when you will manually backup to your external hard drive, and set up automatic recurring backups using a cloud service.

A manual backup to an external hard drive is simple. Connect your EHD to the computer using a USB cable, a picture of the EHD shows up on your desktop, drag folders from your computer and drop them onto the EDH. To view the contents of your EDH, double click on the desktop image and it will display its contents in the open window.

An excellent cloud service for automatic recurring backups is Backblaze.

If all three of these methods fail, we probably have bigger problems to worry about like an end of days scenario. ;)

If using 2 external hard drives, choose 2 different brands AND replace the external hard drives every 3 to 5 years, as they will also fail eventually.

Backup and “The Cloud” ☁️

Examples of Important Documents to Backup

  • Will / legal documents

  • School Report Cards

  • Medical records

  • Financial records (bank statements, investment portfolio)

  • Children’s Artwork

  • Birth/death certificate

  • Government Issued License (marriage, divorce, drivers)

  • Passport

  • Certificates

  • Appliance Warranty

  • Auto Title

  • Home Title

  • Transcripts

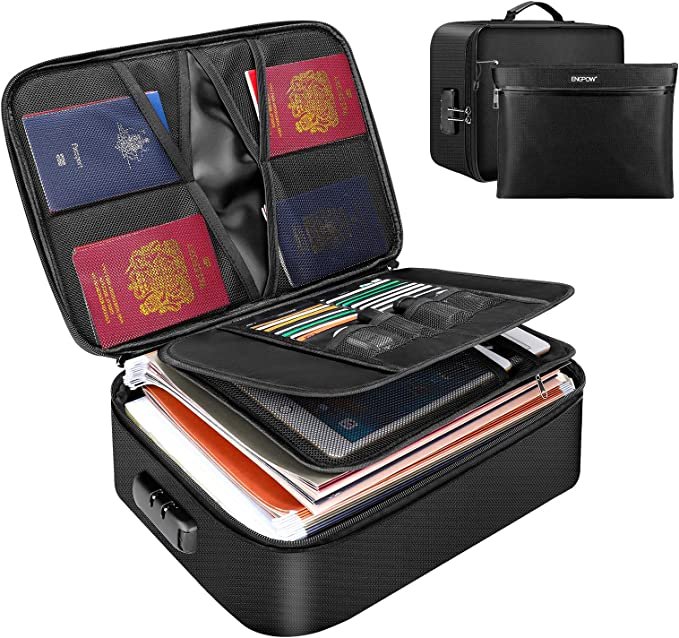
Physical documents should be stored in a fireproof case or safe. Example below.

Honestly, a whole book could be written about backing up your photos and important data. Giving backup advice is kind of like giving tax or legal advice. However, if you follow the 3-2-1 protocol, it is easier than you think and you are definitely capable of doing it well. This is a simple strategy that can be adjusted over time. I will be general in my explanation to keep things simple. It is easy to become overwhelmed with technology, but understanding the basics can help you make decisions that you feel comfortable with.

Cloud Storage versus Cloud Backup ☁️

Cloud Storage refers to a group of servers connected through networks. (Similar to the internet)

Examples of cloud based photo storage providers are;

Amazon Photos - "Amazon Photos offers free online photo storage to Prime members, who can save and share unlimited photos on desktop, mobile, and tablet."

Dropbox Photos - Dropbox lets you back up photos to the cloud from iPhone, Android, Windows, Mac, and your camera.

Flickr - The safest and most inclusive global community of photography enthusiasts. The best place for inspiration, connection, and sharing!

FOREVER® | Permanent Online Photo Storage - Clean up your photo mess now and FOREVER®. Sign up to access cloud photo storage, photo books, scanning, digital scrapbooking, digital art, more.

Google Photos - "Google Photos is the home for all your photos and videos, automatically organized and easy to share."

iCloud Photo Library - Set up and use iCloud Photos

In “the cloud”, there are either syncing services (storage), and there are backup services. Syncing services sync or mirror your data. Sync solutions are susceptible to problems if you don’t understand that the changes you make on one device, are also made in the other devices. They mirror each other. The good thing about syncing is that if your computer dies, a copy of your data is still in the cloud (synced copy). When you are ready you can copy those synced folders to your desktop once you fix your computer or get a new one. This is why it can feel like a backup.

Examples of cloud based data storage providers are:

Amazon S3 - "Amazon S3 is cloud object storage with industry-leading scalability, data availability, security, and performance. S3 is ideal for data lakes, mobile applications, backup and restore, archival, IoT devices, ML, AI, and analytics."

Google Drive - Learn about Google Drive’s file sharing platform that provides a personal, secure cloud storage option to share content with other users.

iCloud Drive - With iCloud and iCloud+, all your photos, files, notes, and more are safe and available wherever you are. Automatically.

Dropbox - Dropbox is a service that lets you bring your photos, docs, and videos anywhere and share them easily.

Evernote - Evernote is the top online notepad app to take notes, share, organize, and store straight on your device.

To get around potential syncing problems, for example, if you are using Dropbox, don’t download the desktop software. Only use the web portal to upload and download data. That way you don’t have a copy on your desktop that is mirroring the cloud copy.

You can also use selective syncing which allows you to choose which data you want to sync or not. This is a good way to free up space on your desktop/laptop hard drive. You are saving the files (data) elsewhere in the cloud and when you need to access the data, you can download the contents and re-upload to the cloud manually. Read this article as an example of problems that can occur using sync services.

I use iCloud with my computer’s native folder structure so that I have access to my folders/files/documents on multiple devices. (laptop, desktop, mobile) Using cloud syncing services is a strategy for convenience. It is not a reliable backup.

Cloud Backup

A legitimate cloud backup, is its own entity and allows you to go back in time. It is a complete backup of data protected from changes applied in other places. When you need to recover lost data, you can go back in time, & use the backup to restore lost or corrupted files (data). Backblaze makes cloud backup extremely easy by backing up automatically for you and it is simple to restore data as well. You can also access and share your saved data from your mobile device.

Photo Backup

When you are choosing how to backup your photos, make sure you understand the differences between syncing and a backup. More about that below.

There are at least 4 or 5 types of backups. (Full, Mirrored, Incremental, Differential and so on.) Read about the different backups here. You only need to know that different backup types will effect the amount of storage space you use.

How much storage do you need? It depends. A professional photographer will need oodles of storage compared to a non-professional. I like to recommend 2TB of storage for memories.

For reference:

1024 KB = 1 MB

1024 MB = 1 GB

1024 GB = 1 TB

My personal backup recipe:

I do full, on demand (manual) backups once a week to an external hard drive, AND I use Backblaze recurring automatic backup service in the cloud. The personal subscription is only $7/mo for unlimited data.

My scanned photos which are saved in a native folder structure (my Photo Capsule), are saved right along with everything else on my computer’s hard drive and on Backblaze. However, as I mentioned above, I keep an external hard drive designated for only memories.

As well as the Photo Capsule backup, all of my photos are organized in Apple’s Photos Application. From there, my digital photos and my scanned to digital photos are synced to iCloud Photo Library. iCloud is a paid for service. Apple offers iCloud storage free up to 5 GB and you can add additional space for a monthly fee.

iCloud Photo Library stores your full resolution photos in the cloud and gives you access to your photos on all your devices. Like other syncing services, it will make changes across all of your devices when you edit, delete, and duplicate photos.

Mac User’s:

If you are uncertain of your iCloud settings, check your system preferences.

System Preferences > iCloud > iCloud Storage is listed at the bottom of the pop-up window letting you know how much storage you have and how much is still available.

Click on your Photos Options to select your desired settings.

iCloud Photo Library is storage for your Photos Library within iCloud.

My Photo Stream is only your most recent 1,000 photos. Without selecting iCloud Library, any photos beyond 1,000 will be deleted starting with the oldest.

iCloud Photo Sharing allows you to create albums you can share with other people via invitation and allows you to subscribe to other people’s shared albums. Think of shared albums as a private Facebook feed and you have chosen who gets to see your photo posts.

If you are wondering where some of your photos have disappeared to, you may not have iCloud Photo Library checked (selected)!

iPhone owners without an apple computer:

Access your Photos settings on your iPhone. Settings > Photos & Camera

Access your Storage & iCloud Usage on your iPhone. Settings > General > Storage & iCloud Usage

Here is more information about the different cloud features offered by Apple.

Apple user’s can check out Apple’s automatic backup application Time Machine, which can be used with any external hard drive. This is automated backup like Backblaze but is saved locally on your external drive.

Here is an external hard drive I recommend by Western Digital.

Summary

Take responsibility of your backup strategy by understanding the basics.

Choose multiple backup solutions and stick to a consistent schedule for full backups using an external hard drive. Include an automated backup like Backblaze which allows you to be imperfect in your manual backups. Have a minimum of 2 backups on different platforms. At least one external hard drive and another in the cloud. Purchase new external hard drives every 3-5 years.

Implement a backup strategy today to protect yourself from heartache in the future. This is for your benefit, as well as the generations to come. The investment in safe keeping your data is well worth it!

If you are feeling overwhelmed and unsure how to get started, do yourself a favor and subscribe to Backblaze today to backup your current situation. You don't need to organize or do anything first, before simply backing up your precious images and documents.

Action Items:

  1. Sign up for Backblaze now and download the free trial. It does all the hard work for you!

  2. Purchase an external hard drive and create a full backup.

  3. Create a recurring event in your calendar (weekly) to manually backup your hard drive.

  4. Create a duplicate backup on a separate hard drive, and store it at a friends house.

Questions?

Please contact me via email. You can also schedule a 15 minute no-strings appointment here to discuss your project.

*Affiliate disclaimer: Some the links in this article contain affiliate links which I will receive a small commission for referral. The cost remains the same for you either way. I only recommend the services that I use myself and I have found to be the most reliable and useful in my line of work.


Bring An Old Photo Album Back to Life Using Keynote


Simplified Breakdown:

  1. Scan full pages of album or scrapbook using a flatbed scanner

  2. Add images to Apple’s free presentation software: Keynote

  3. Position images to your liking on each slide

  4. Export as video, pdf, or animated gif

  5. Share a digital or physical copy with family and friends


Photo albums from the 1900s are dying. The plastic is cracked and the photos are fading quickly. The adhesion is either permanently stuck to the images or has failed and when we want to look through the album, everything falls out!

That sticky album idea was probably a bad idea, to begin with, but now we have choices. My job is to lay it out for you so you can choose the easiest way forward for your baby books, scrapbooks, and albums from the 70s and 80s.


Before I walk you through this process, keep in mind that there are many different ways to go about digitizing your albums. People will always try to overcomplicate things by getting stuck on details. The point of this project is to get it done. If you have the money to get professional help, do it. If you don’t, then I promise you can do this with what you have or by borrowing equipment. (a nice camera or a flatbed scanner)


1 Digitize Album Pages

The first step is to get your album pages digitized. This can be done yourself or by hiring a local photo organizer with scanning services. Lay the page down flat on the clean and dry surface of the scanner. If you have the option, scan at 600 DPI for nice big file size.

If your album is too large for your flatbed scanner, you can use a camera to take high-resolution images of each page. The camera arm mount that I use is really basic but inexpensive.

It’s a good idea to save these scanned images into a folder named after the album you’ve scanned.

IMG_5558.JPG

My camera setup for oversized albums.

I mount my camera with an adjustable arm mount to a folding table and use the natural light from the window. You can spend hundreds of dollars on various kits but I had this in my arsenal already and it works so far.


2 Add pages to Keynote

The second step is to take those digitized images/pages and drag them into a presentation application. I’m a mac user so for me that’s Keynote. I’m sure you can do similar things with Powerpoint & Google Slides.

Select all the album page images in the finder window and drag them onto a new keynote file. Drop them where the slide thumbnails are in the left sidebar area and each image becomes a new slide.


3 Fit Images to slides

The third step is to position the images and customize the slide size to get the shape of the album as accurate as possible. For example, if your album pages are vertically oriented like many old albums, adjust the document size to 9 by 11 inches. In pixels, this is 2700 by 3300. (Google search).

Then you can fit the images to the slide manually.


Optional - Make The Background Transparent

Optionally, you can edit the look of the pages using the Instant Alpha tool. This tool will allow you to make the background transparent which will remove the aged album background look. To use the tool select the image by clicking on it. Once the image is selected, the instant alpha tool will appear in the right sidebar area. Click on the button and begin by selecting small sections of the background. This takes a bit of patience because you can easily over select areas which will remove portions of the images that are similar in color to the background. Work slowly in small movements in order to remove the background only. If you make a mistake you can UNDO it by pressing the command button and the letter Z. (Or go up to the edit menu and select UNDO in the drop-down.)


4 Export As Video, PDF, or Animated GIF

Export your slides as a self-playing video. You can post the video anywhere online including YouTube in order to share it. Keep in mind you can keep YouTube videos unlisted and share the link if you don’t want to share publicly.


Export as PDF. This is an easy format to share and view. A huge bonus with PDF versions is that you can use the PDF to create physical books! Many photo book services allow you to upload a PDF to build a photo book. Choose the print service before you adjust the slide sizes. (step 3 above) This way you can customize the dimensions to suit the book size. If the print service requires jpegs instead of PDF, just export the slides as jpeg images instead of PDF.

I am LOVING MILK BOOKS right now! They have an app that works inside the Apple Photos Application so you can build your photo book with the simplicity of the Photos App we are already accustomed to. They even have the option to print in Moleskine Journals. Other options are Printique, PrestoPhoto, and Artifact Uprising.


Export as an animated GIF. This is just a fun way to share your album without sending a massive file. It’s not practical with a large album but just a unique way to share.


5 Share Digital Version With Family & Friends

Now that you’ve digitized your old album, you can share whichever version you prefer with others. By digitizing the entire page of an album, the process is fairly quick and simple. Once you get the hang of using Keynote, you will probably realize there are more ways you can use it to rebuild albums with individual images as well. Keynote is a truly underrated tool that can be used to create digital scrapbooks and albums. Photos and any digitized document can be imported and arranged in any angle or shape within slides so the possibilities are endless, and limited only by your imagination!

How To Download Your Flickr Photos Using PicBackMan

Photo credit Flickr

Photo credit Flickr

Flickr was acquired by SmugMug back in April 2018 and they are changing things up. For those of you who use the free account for photo storage, today is the last day to upgrade to pro and save your photos from being deleted. According to Flickr: After February 5, 2019, free accounts that contain over 1,000 photos or videos will have content actively deleted—starting from oldest to newest date uploaded—to meet the new limit.

By the way they have some super deals if you upgrade by today January 8th. Check it out here. Pretty sweet stuff. Use coupon code FLICKRPRO15 for 15% off today.

If you have more than 1000 photos and you don’t want to upgrade, here is how to download your images using PicBackMan.

Flickr Migration Guide

If you want help with migrating your photos, be sure to schedule a call today!

How To Make A Christmas Card Screen Saver On Apple TV

How To Make A Christmas Card Screen Saver On Apple TV

Ever wonder what to do with all those Christmas cards that come in every year? This is how to enjoy them to the fullest and throw them away without guilt!

christmas card.001.png

Step by step below or download the complete checklist here.

Checklist Summary

    1. Update your iPhone, (iPad etc) to the latest version of iOS, and your Mac to the latest version of macOS.

    2. Update the software on your apple TV

    3. Turn on iCloud Photos

    4. Scan Christmas Cards

    5. Create a new album in your Photos App

    6. Create screen saver on Apple TV

    7. View as slideshow (bonus)

    8. Throw away your physical cards!


1.  Update your iPhone, (iPad etc) to the latest version of iOS, & your Mac to the latest version of macOS

Use the latest version of iOS

Make sure that your device is running the latest version of iOS. Go to Settings > General > Software Update. See if there’s an update available.

Use the latest version of macOS

How to get updates for macOS Mojave

If you already upgraded to macOS Mojave, follow these steps to keep it up to date: 

1. Choose System Preferences from the Apple () menu, then click Software Update to check for updates.

2. If any updates are available, click the Update Now button to install them. Or click ”More info” to see details about each update and select specific updates to install. 

3. When Software Update says that your Mac is up to date, macOS and all of its apps are also up to date. That includes SafariiTunes, Books, Messages, Mail, Calendar, Photos, and FaceTime.

To automatically install macOS updates in the future, including apps downloaded from the App Store, select ”Automatically keep my Mac up to date.” Your Mac will notify you when updates require it to restart, so you can always choose to install those later.

How to get updates for earlier macOS versions

If you're using an earlier macOS, such as macOS High Sierra, Sierra, El Capitan, or earlier, follow these steps to keep it up to date:

1. Open the App Store app on your Mac.

2. Click Updates in the App Store toolbar.

3. Use the Update buttons to download and install any updates listed.

4. When the App Store shows no more updates, your version of macOS and all of its apps are up to date. That includes SafariiTunes, iBooks, Messages, Mail,  Calendar, Photos, and FaceTime. Later versions are available by upgrading your macOS.

To automatically download updates in the future, choose Apple menu () > System Preferences, click App Store, then select ”Download newly available updates in the background.” Your Mac will notify you when updates are ready to install.


2. Update the software on your Apple TV

Check for updates

1. On Apple TV 4K or Apple TV (4th generation), go to Settings > System > Software Updates and Select Update Software.

2. If there's an update, select Download and Install. Wait for your Apple TV to download the update. Don't disconnect or unplug your Apple TV until the update completes. 

3. After the update downloads, your Apple TV will restart and prepare the update. Don't disconnect or unplug your Apple TV until the update completes.

4. After Apple TV prepares the update, it will install it. When the update is complete, your Apple TV will automatically restart again.

To update the software on Apple TV (2nd or 3rd generation), go to Settings > General > Update Software. If there's an update, download and install it. Don't disconnect or unplug your Apple TV until the update completes.


3. Turn On iCloud Photos

On your iPhone, iPad, or iPod touch with iOS 10.3 or later, go to Settings > [your name] > iCloud > Photos, then turn on iCloud Photos.

On your Mac with OS X 10.10.3 or later, go to System Preferences > iCloud. Click Options next to Photos, then select iCloud Photos.

On Apple TV 4K and Apple TV (4th generation) with tvOS 9.2 or later, go to Settings > Accounts > iCloud > iCloud Photos.


4. Scan Christmas Cards

Use a scanning App or take a picture with your iPhone Camera

Suggested App:

Pic Scanner Gold - Scan Photos


5. Create a new album in your Photos App

Create albums in Photos on Mac iOS (iPhone/iPad)

1. Tap open the Photos App

2. Tap on the Albums icon at the bottom of the screen

3. Tap the + sign in the upper left corner

4. Enter an album name ex. 2018 Christmas Cards

5. Choose the photos you want to organize in the new album. You will select your Christmas Card photos after scanning them. 

6. Add photos (scanned images) to an existing album: Tap Select and then tap the photos and videos that you want to add. Tap Add To and choose the album.

Create albums in Photos on Mac

Create a new album

In the Photos app on your Mac, do one of the following:

    • Create an empty album: Choose File > New Album, or position the pointer over the sidebar next to My Albums and click the Add button , then choose Album.

    • Create a new album from a group of photos: Select the photos you want in a new album, then choose File > New Album With Selection, or Control-click one of the selected photos and choose Add To > New Album.

      Type a name for your new album in the sidebar and press Return.

Add photos to an existing album

In the Photos app on your Mac, select the photos you want to add.

Do one of the following:

    • Drag the selected photos to an album in the sidebar, or Control-click a selected photo and choose Add To > [album name].

    • Control-click one of the selected photos and choose Add To > [album name]

    • Drag the thumbnail in the selection indicator at the top of the window to an album in the sidebar.

6. Create a screen saver on Apple TV

Create a photo screen saver on Apple TV

You can use shared photos or albums in the Photos app  as your Apple TV screen saver.

Set a screen saver

1. Open the Photos app, then swipe to the Shared category in the menu bar.

Note: If you don’t see the Shared category, go to Settings > Accounts > iCloud and turn on Shared Albums.

2. Select an album (2018 Christmas Cards), then select Set as Screen saver and confirm.


Adjust screen saver settings

1. Open Settings on Apple TV.

2. Go to General > Screen Saver


Activate the screen saver immediately

Press and hold the  button to return to the Home screen, then press the  button again.


Adjust screen saver settings

1. Open Settings  on Apple TV.

2. Go to General > Screen Saver, then do any of the following:

    • Choose a different screen saver: Select Type, then select the screen saver you want to use.

    • Select which photos to display:
      Choose My Photos, the Photos app opens.  Select the Christmas Cards album.  

    • Set the screen saver delay time: Select Start After, then specify a number of minutes. This instructs Apple TV to automatically start the screen saver if the device has been idle for the specified duration.

    • Preview a screen saver: Select Preview.


7. View as slideshow (bonus)

Create a slideshow on Apple TV

You can view your shared photos and albums as a slideshow on Apple TV.

Create a slideshow and adjust slideshow settings

1. Open the Photos app , then swipe to the Shared category in the menu bar.

Note: If you don’t see the Shared category, go to Settings > Accounts > iCloud and turn on Shared Albums.

2. Select an album or Photo Stream in My Albums, then select Play Slideshow.

3. Select to adjust any of the following settings:

    • Shuffle Photos: Turn on to show your photos in random order.

    • Repeat Photos: Turn on to play the slideshow continuously.

    • Theme: Select a slideshow theme to apply a different style to your slideshow.

    • Time Per Slide: Select how long to display each photo on the screen.

    • Transition: Select the transition effect used between photos.

4. Select Start Slideshow.


8. Throw away your physical cards!


Now enjoy your Christmas cards on your TV like a digital picture frame on steroids, without the cost!

If this is useful, share it with your friends and like the post below.

Happy Holidays!